Saving Tomato Seeds
More Information

Four easy steps to saving your own heirloom tomato seeds!
Seed saving offers plenty of perks aside from saving money, it’s the long term benefit of cultivating the plants you really love and just knowing where they came from! Nothing ever tastes quite as good as a home-grown tomato!
Chose your favorite tomato, ripe off the vine, healthy and soft.
Seeds collected from upripe fruit will not germinate the following year.
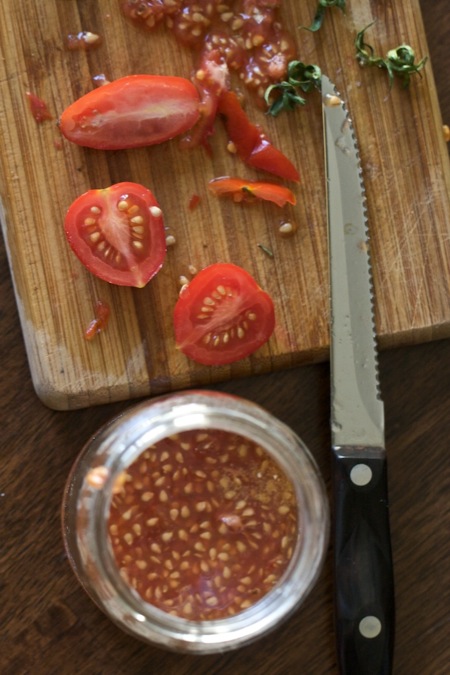 1. Take your chosen tomato and slice it in half across the middle. With a spoon or your well-washed fingers scoop out the seeds and their gelatinous goo into a clean container. Add a couple of tablespoons of water to the seeds. Cover the container with a piece of plastic-wrap and then poke the plastic-wrap with a paring knife or pen point to put a small hole in it…this is to allow for air-transpiration. (A little fresh air needs to get in and out of the cup to help foster fermentation.)
2. Let the mixture ferment for three to six days at room temperature – above the fridge or a sunny window works best, stir your mixture daily.
Change the water at least once during this process.
The top of the liquid will look scummy when the fermentation process has seperated the goo from the seeds.
It also helps destroy many of the possible tomato diseases that can be harbored by seeds.
3. Using a fine sieve – strain and rinse your seeds, assure that all surfaces are thoroughly rinsed.
Nonviable seeds will float to the top of your goo, discard these seeds along with your gelatinous goo.
4. Let your seeds dry on wax paper on a flat surface, such as a cookie sheet or plate. This will take a few days, if they do not dry properly they will be vulnerable to mold. Store the seeds in an envelope or paper bag in a cool dry spot – these seeds can be used for up to four years! Don’t forget to label!